
Tips for Conducting Home Inspections with a Thermal Camera
As people’s demands for living environment quality continue to rise, building inspections have gradually become a crucial component in real estate transactions, building maintenance, and energy-efficient retrofits. Traditional inspection methods often rely on manual experience or localized destructive sampling, resulting in low efficiency, limited scope, and difficulty in promptly identifying potential hazards. Infrared thermal imagers, with their non-contact, real-time, and visual characteristics, have emerged as essential tools in building inspections. Whether assessing exterior wall insulation performance, detecting leaks, evaluating building airtightness, or inspecting electrical equipment, infrared technology enables inspectors to rapidly pinpoint issues, enhancing both inspection efficiency and accuracy.
This guide provides an application manual for infrared thermal imaging cameras in building inspections. It covers inspection principles, environmental condition selection, equipment usage techniques, practical application scenarios, and product recommendations to help you maximize the benefits of infrared technology.
1. Principles of Infrared Thermal Imaging for Building Inspection
In nature, all objects with a temperature above absolute zero continuously emit infrared radiation energy—buildings are no exception. An object’s infrared radiation characteristics are closely related to its surface temperature. Therefore, by measuring the object’s own infrared radiation, its surface temperature distribution can be accurately reflected.
Infrared thermal imaging technology operates on this principle: an infrared detector captures the infrared radiation emitted from a target’s surface and converts it into a visual thermal image. Within this image, different colors correspond to varying temperature levels. When anomalies occur in a building structure or equipment during heat transfer, localized temperature distributions exhibit distinct color differences from surrounding areas, revealing potential structural defects, equipment failures, or energy losses.
Compared to traditional inspection methods, infrared thermal imaging offers the following advantages:
· Non-contact: Obtains temperature data without damaging building structures;
· Long-range: Enables inspection from safe distances, reducing operational risks;
· Real-time and rapid: Scans large areas in seconds for immediate issue detection;
· Multi-scenario applicability: Suitable for diverse inspection needs including exterior wall insulation, roof leaks, electrical systems, and HVAC piping networks.
Using infrared thermal imagers, inspectors can visually identify abnormal temperature zones on building surfaces, rapidly pinpoint potential hazards, and implement preventive measures. This not only enhances structural safety and reliability but also optimizes equipment maintenance effectiveness, while playing a significant role in building energy management and energy conservation efforts.
2. Selection of Environmental Conditions
The effectiveness of infrared thermal imaging inspections is influenced by factors such as inspection timing, climatic conditions, and indoor/outdoor heat sources. To ensure thermal images accurately reflect a building’s thermal characteristics, the following environmental conditions should be considered prior to inspection:
1)Outdoor Conditions
Weather Requirements: Thermal imaging inspections should be conducted during clear weather with relatively stable temperatures whenever possible. Avoid environments with direct sunlight, excessive wind, or high humidity.
Time Selection: For building exterior wall inspections, schedule inspections during early morning or evening hours when solar radiation has minimal impact, facilitating more accurate temperature distribution data acquisition.
Result Adjustment: If inspections must be performed under unfavorable weather conditions, incorporate weather factors into the analysis process for appropriate adjustments.
2)Indoor Conditions
Temperature Differential Maintenance: Ensure a consistent indoor-outdoor temperature differential (typically recommended above 10°C) for at least 24 hours prior to inspection, and maintain stability during testing.
Temperature Equalization: Open doors and windows in all rooms during inspection to ensure uniform overall temperature, preventing localized variations from affecting results.
Minimize Heat Source Interference: Avoid artificial heat sources like air conditioning vents or operating furnaces, as these may cause the thermal imager to capture “artificially generated heat flows” rather than the building structure’s true thermal characteristics. Document details such as indoor heating system types and the locations of hot/cold pipes during inspection for subsequent analysis.
By selecting appropriate inspection environments and eliminating interference factors, infrared thermal imaging inspections achieve greater accuracy and reference value, providing reliable data for building energy efficiency assessments and hazard identification.
3. Equipment Usage Tips
Beyond environmental conditions, proper operation of infrared thermal imagers is equally crucial for ensuring detection accuracy. The following best practices can help enhance detection quality:
1)Select Appropriate Models: Thermal imager performance does not follow the principle of “higher specifications always better.” When selecting a model, comprehensively consider detection distance, target size, operating environment, and budget. Focus on parameters such as resolution, thermal sensitivity (NETD), and field of view. Match device performance appropriately to ensure measurement accuracy and image clarity.
2) Lens Cleaning: Dust, smudges, or fingerprints on the lens interfere with infrared radiation reception, affecting measurement results. Regularly inspect the lens and clean it using a dedicated cleaning cloth and solution.
3) Focus Adjustment: Focus position directly impacts image clarity and measurement accuracy. Adjust the thermal imager’s focus manually or electronically to ensure clear target visibility.
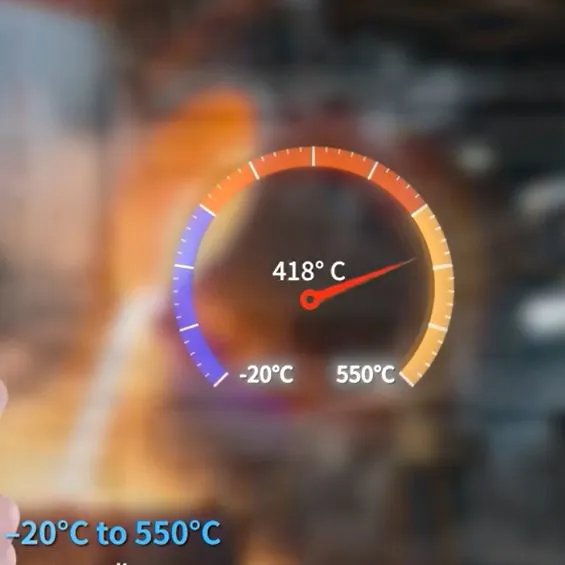
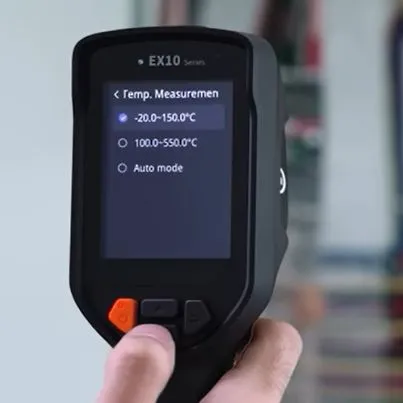
4) Temperature Range Selection: Choose an appropriate measurement range based on the target’s temperature distribution. If the thermal imager supports adaptive temperature scaling, it will adjust automatically; otherwise, manually set the temperature range according to specific application scenarios.

5) Color Palette Selection: Different palettes can highlight distinct temperature characteristics, making image analysis more intuitive.
6) Environmental Parameter Correction: Accurately set key parameters such as emissivity, reflected temperature, target distance, atmospheric transmittance, and ambient temperature to ensure measurement precision. Emissivity is particularly critical; under low emissivity conditions, the reflected temperature must also be precisely configured.

7) Reduce Reflective Interference: Surfaces like metal, glass, and polished stone strongly reflect infrared radiation. When capturing images, maintain a slight tilt angle between the lens and the surface to prevent infrared energy from reflecting directly back into the lens, thereby minimizing interference.
8) Multi-angle Acquisition: Avoid capturing thermal images from a single angle. When necessary, combine multi-directional shots to minimize errors caused by reflections and obstructions.
9) Utilize Temperature Analysis Tools: Integrate professional temperature analysis tools, such as region-of-interest measurements, isotherms, and temperature change curves, to obtain critical data. Avoid relying solely on subjective visual judgments of image colors.
10) Avoid Overinterpretation: Thermal images merely visualize temperature distributions. Different materials possess varying thermal conductivities, and temperature anomalies do not necessarily indicate structural defects. Conduct comprehensive analysis considering building materials, structural characteristics, and actual conditions.
11) Comparison and Validation: Correlate infrared inspection results with actual conditions, historical data, or other inspection methods to enhance the reliability of conclusions.
4. Building Inspection Applications
Thermal imaging cameras offer intuitive, fast, and non-destructive advantages in building inspections, helping identify problems that traditional methods often miss. Below are common application examples:
1)Wall Moisture Detection
Moisture-affected areas have a higher water content, which absorbs heat during evaporation, causing the surface temperature to be lower than surrounding dry areas. A thermal imaging camera can clearly display “cold zones”on the wall, allowing inspectors to locate the source and extent of water intrusion even when no visible damp marks are present.

2)Wall Defect Detection
Defects in wall insulation can cause heat loss. During winter inspections, these defective areas typically appear as noticeable “hot spots”, while in summer they may show as “cold zones”. Thermal imaging cameras allow for quick identification of problem areas, providing a solid basis for energy-saving renovations and maintenance.

3)HVAC Pipeline Inspection
HVAC pipelines can exhibit abnormal temperature distributions if there are blockages, leaks, or poor insulation. Thermal imaging cameras provide a clear visual representation of the pipeline operation, enabling timely detection of issues and maintenance to ensure efficient HVAC system performance.

4)Electrical Safety Inspection
Electrical components such as wire joints, switches, or elements inside distribution boxes may overheat if there is poor contact or overload. Thermal imaging cameras can detect abnormal temperatures or heat increases at an early stage, allowing users to take preventive measures and effectively avoid electrical fires.

5)Door and Window Air Tightness Inspection
The airtightness of doors and windows directly affects a building’s energy consumption and comfort. Using a thermal imaging camera, areas of air leakage can be detected; even small gaps invisible to the naked eye are clearly visible, helping guide sealing improvements and enhance energy efficiency.

5. Raythink Thermal Imaging Equipment Recommendations

6. Conclusion
Thermal imaging technology allows us to examine building structures from a “temperature perspective,” revealing potential issues hidden within walls, roofs, and pipelines. However, accurate and reliable inspection results depend on selecting the proper environment and operating the equipment correctly. Whether you are a professional inspection agency, building maintenance company, residential property manager, or a homeowner concerned with living quality, mastering the usage tips outlined in this article can help improve the accuracy and practical value of thermal inspections.
When choosing thermal imaging equipment, both brand reputation and technology matter. As a widely recognized high-end thermal imaging brand in the industry, Raythink has become the preferred choice for many building inspection and energy assessment projects, thanks to its excellent imaging accuracy, stable performance, and intelligent analysis capabilities. Contact the Raythink technical team for professional selection advice and application guidance to enhance your inspection results and work efficiency.
Recently Posted
-
International Day of Forests 2026: Safeguarding Forests and Economies with Thermal Imaging
April 24, 2026The theme of the International Day of Forests 2026, “Forests and Economies,” highlights the vital role forests play in supporting Read More
 -
Raythink Releases EV Lithium-ion Battery Thermal Safety White Paper
April 21, 2026As electric vehicles (EVs) continue their rapid global adoption, ensuring high-energy lithium-ion battery safety has become a crit Read More
 -
Application of Gas Detection Thermal Cameras in Environmental Monitoring
April 16, 2026In industrial production, energy transportation, cold chain operation and other scenarios, the leakage of VOCs (Volatile Organic C Read More
 -
Raythink’s AI-Powered Thermal Outdoor Security Cameras Protect Communities and Assets
April 14, 2026As winter conditions continue to impact parts of the United States and Europe, organizations are once again facing operational cha Read More

Contact Us
Recommended Products
-
 WN2 Imaging Thermal Module | Uncooled 12μm Infrared Camera Core With Multi-Resolution OptionsNegotiableMOQ: 1 Box
 -
640×512 High Resolution Uncooled Infrared OGI Camera RG630F for Petrochemical Gas SafetyUS$ 99999MOQ: 1 Set
-
RG630F AI Powered Handheld OGI Camera for Non-Contact Industrial Gas Leak Visual DetectionUS$ 99999MOQ: 1 Set
-
High-Sensitivity RG630C OGI Camera With Real-Time Gas Leak Monitoring & GPS TrackingNegotiableMOQ: 1 Set
-
Industrial-Grade RG630C OGI Camera for Oil, Gas and Petrochemical Leak MaintenanceNegotiableMOQ: 1 Set

-
AI-Powered RG630C Camera for Methane, Ammonia and SF6 Gas Leak VisualizationNegotiableMOQ: 1 Set
-
High-Resolution RG630C OGI Camera Compliant With EPA Appendix K for Gas Leak InspectionsNegotiableMOQ: 1 Set
-
RG630C Handheld OGI Camera for Non-Contact Visual Gas Leakage Detection & Safety MonitoringNegotiableMOQ: 1 Set
-
EX10 Infrared Thermal Imager for Precise HVAC Efficiency & Circuit Overheating ChecksNegotiableMOQ: 100 Sets
-
High-Performance EX10 Thermal Camera Enhancing Safety in Electrical MaintenanceNegotiableMOQ: 100 Sets
-
EX10 Thermal Imaging Device for Accurate Electrical & HVAC InspectionsNegotiableMOQ: 100 Sets
-
PC464A1 IP66 Rated Dual-Spectrum PTZ Camera With Thermal Imaging and 500m Surveillance RangeNegotiableMOQ: 100 Pieces
-
Raythink PC464A1 Dual-Spectrum PTZ Camera for Long-Range Perimeter Security and Fire DetectionNegotiableMOQ: 100 Pieces
-
PC464A1 Dual-Spectrum PTZ Camera With 30x Optical Zoom and AI Analytics for Critical Infrastructure SecurityNegotiableMOQ: 100 Pieces
-
High-Resolution 1280×1024 Uncooled VOx Infrared Thermal Imaging Module With LY300 ASICNegotiableMOQ: 1 Box
-
Long Wave Infrared Thermal Imaging Module TC 2-C With LY300 ASIC for Industrial MonitoringNegotiableMOQ: 1 Box
-
WN2 Series Uncooled Infrared Module With High-Frame-Rate 12μm WLP Detector for Intelligent Platform IntegrationNegotiableMOQ: 1 Box
-
RT630 Rugged Thermal Imaging Camera for Harsh Industrial Environments & Portable Electrical ChecksNegotiableMOQ: 50 Pieces
-
User-Friendly RT630 Thermal Camera With 8-Hour Battery & LCD Display for Field DiagnosticsNegotiableMOQ: 50 Pieces
-
Durable RT630 Thermal Imager With Enhanced Accuracy ±2°C/2% for Reliable Preventive MaintenanceNegotiableMOQ: 50 Pieces

