What Is Emissivity in Thermal Imaging?
Emissivity is the ratio of the energy radiated by an object at a given temperature to the energy radiated by a blackbody at the same temperature. It’s used to measure an object’s ability to emit infrared energy and is a crucial parameter in infrared thermography (thermal imaging).
Value RangeEmissivity ranges between 0 and 1. A higher value indicates a stronger ability of the object to radiate infrared energy. In an ideal scenario, a blackbody has an emissivity of 1, meaning it radiates all possible energy. In reality, the emissivity of other objects is typically less than 1.
What Affects a Material's Emissivity?To more effectively utilize thermal imagers for precise measurements, beyond understanding the basic concept of material emissivity, we also need to know what determines an object’s emissivity. Next, we will explore the factors that affect material emissivity.
1. Different Material PropertiesThe term “different material properties” here refers not only to variations in a material’s chemical composition and chemical properties but also to differences in its physical properties and internal structure, such as surface layer structure and crystalline state.
For example, the emissivity of most pure metal surfaces is very low, while the emissivity of most non-metallic materials (especially metal oxides) in the infrared spectral region is very high. When the temperature is below 300K, the emissivity of metal oxides is generally greater than 0.8.
2. Surface ConditionFor non-metallic materials, emissivity is minimally affected or unaffected by surface roughness. However, for metallic materials, surface roughness will significantly impact emissivity. For example, wrought iron with a rough surface at 300K has an emissivity of 0.94, while the same material with a polished surface at 310K has an emissivity of only 0.28.
3. Surface TemperatureIn many formulas, emissivity is treated as a variable dependent on temperature, but the specific way emissivity changes with temperature is often not explicitly stated. This is because the relationship varies for different materials across different wavelengths and temperature ranges, making it difficult to summarize quantitatively with a unified analytical expression. General experiments show that the emissivity of most non-metallic materials decreases as temperature increases. Conversely, the emissivity of most pure metals increases approximately proportionally with Kelvin temperature, and the proportionality constant is related to the metal’s resistivity.
4. Measurement WavebandThe spectral emissivity of an object’s surface changes with wavelength. In the infrared region, the spectral emissivity of most objects decreases as the wavelength increases. The emissivity used during temperature measurement is the average emissivity over the detector’s response waveband, and its value depends on this waveband.
Different infrared thermal imagers have different detector response wavebands. Therefore, when measuring the emissivity of the same object with different thermal imagers, the results obtained may vary. However, if their respective measured emissivities are used to correct for the object’s true temperature, the results should be the same. This is why each infrared thermal imager undergoes precise calibration before leaving the factory; although the calibration constants may differ, they all achieve accurate measurement results.
Furthermore, the emissivity of an object measured with one type of thermal imager should not be used on other thermal imagers without careful consideration, as this can lead to significant temperature measurement errors or even incorrect results.
How to Determine the Emissivity of an Object's Surface?Method 1: Consult Emissivity Reference TablesApplicable Scenario: This is the most straightforward method when the material of the object being measured is clearly identified.
First, identify the specific material of the object and consult reliable emissivity reference tables. Based on the emissivity value found for the corresponding material, enter this value into the thermal imager settings.
Method 2: Using an Auxiliary Material with Known Emissivity (Tape Method)Applicable Scenario: Suitable for situations involving materials with low emissivity, relatively large targets, and moderate temperatures (typically below 100°C), where altering the target surface is undesirable, such as with metal surfaces.
Affix a piece of insulating tape (with known emissivity) to the surface of the object being measured. Then, keeping the thermal imager’s distance and angle constant, adjust the infrared thermal imager’s emissivity setting until the temperature reading of the bare material surface matches or is close to the temperature reading of the tape surface. The emissivity value at this point is the correct emissivity of the material being measured.
Note: Ensure the tape has good contact with the target surface, without any air bubbles or wrinkles.
Method 3: Using a Coating with Known Emissivity (Spray Paint Method)Applicable Scenario: Suitable for targets with low emissivity and high temperatures, or when dealing with small objects, such as pipes and irregular heat sinks.
Uniformly spray a coating of paint (with known emissivity) onto the surface of the object being measured. Then, keeping the thermal imager’s distance and angle constant, adjust the thermal imager’s emissivity setting until the temperature reading of the unpainted surface matches or is close to the temperature reading of the painted surface. The emissivity value at this point is the correct emissivity of the target object.
Method 4: Comparison with a Contact Thermometer (Comparison Method)Applicable Scenario: Suitable for situations where the surface of the object being measured is accessible for contact.
Use a contact thermometer, such as a thermocouple or resistance temperature detector (RTD), to measure the surface temperature of the object. Then, adjust the infrared thermal imager’s emissivity setting until the surface temperature measured by the thermal imager matches or is close to the surface temperature measured by the contact thermometer. The emissivity value at this point is the correct emissivity of the target object.
How to Set Emissivity in a Thermal Imager?
Most modern thermal imagers allow users to manually adjust the emissivity setting. The specific operation may vary depending on the brand and model, but it typically includes the following methods:
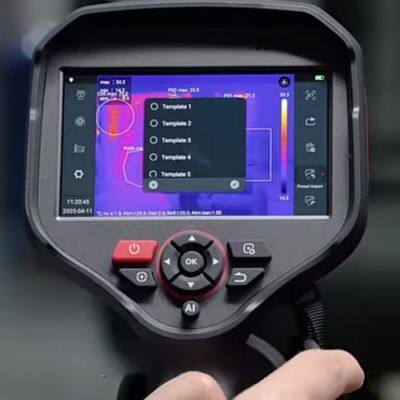
1. Adjusting the Emissivity Value: Users can directly adjust the emissivity in the imager’s settings menu to the corresponding value (usually within the range of 0.01 to 1.00) based on the emissivity value they have looked up.

2. Selecting a Preset Material: Some thermal imagers have a built-in list of emissivity values for common materials. Users can select the option in the menu that most closely matches the material of the object being measured, and the thermal imager will automatically apply the corresponding emissivity value.

Besides emissivity being a crucial compensation parameter affecting temperature measurement results, the reflected temperature from the object’s surface also influences the measurements. This impact becomes more significant when the object’s emissivity is low or when there is a large difference between the object’s temperature and the reflected temperature, thus requiring compensation to eliminate the effect of the reflected surface temperature.
However, the reflected temperature of an object is often difficult to measure directly. In practical measurements, the ambient temperature can be used as an approximation for the reflected temperature. Users can adjust the ambient temperature in the settings interface. By simultaneously setting the correct emissivity and performing ambient compensation, temperature readings closer to the true temperature can be obtained.

Recently Posted
-
Infrared Thermal Imager Solutions for the Rail Transit Industry
March 13, 2026I. Onboard Equipment Monitoring Applications1. Real-Time Monitoring and Early Warning of Pantographs and Catenaries1) Demand Analy Read More
 -
Full-Link Safety Protection Guide for Energy Storage Stations
March 10, 2026As the energy storage industry enters a period of rapid development, overlapping risks such as battery thermal runaway, elec Read More
 -
Raythink Security Thermal Camera for Early Fire Detection
March 9, 2026When traditional detectors capture smoke or high temperatures, the fire may already be spreading, causing irreversible loss Read More
 -
SWIR vs MWIR vs LWIR Thermal Cameras
March 4, 2026In civilian applications such as industrial inspection, security surveillance, and environmental monitoring, infrared therma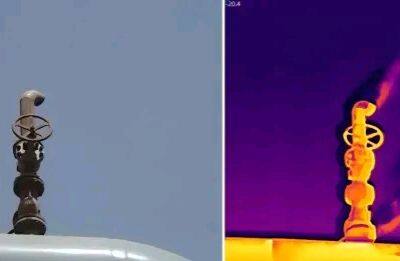 Read More

Contact Us
Recommended Products
-
 Long Range Night Vision PTZ Zoom Infrared Laser Security CameraNegotiableMOQ: 10 Pieces
 -
PC8S4L3 Multi-Spectrum PTZ CameraNegotiableMOQ: 50 Pieces
-
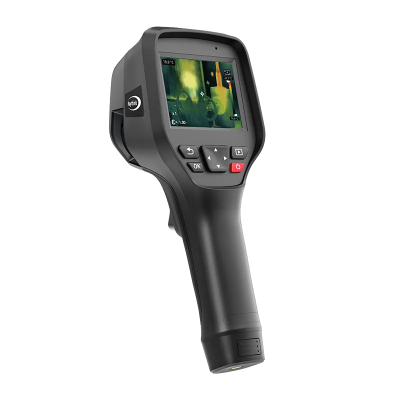
RM200F Handheld Thermal CameraNegotiableMOQ: 10 Pieces
-
PD464T Dual-Spectrum Speed Dome CameraNegotiableMOQ: 50 Pieces
-
AT31 Motorized Focusing Thermal CameraNegotiableMOQ: 50 Pieces

-
AT61 Industrial Thermal Camera Multiple Lens Options With SDK Development PackageNegotiableMOQ: 50 Pieces
-
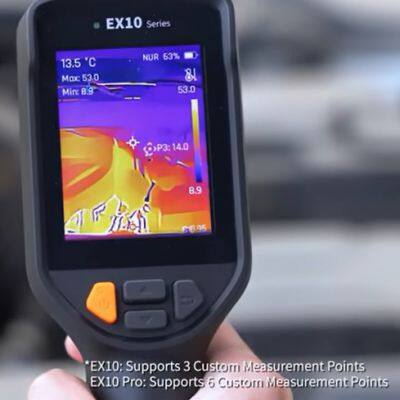
EX10 Handheld IR Camera for Firefighting and Search & Rescue OperationsNegotiableMOQ: 50 Sets
-
RG600C OGI Handheld CameraNegotiableMOQ: 50 Pieces
-
PD225T Dual-Spectrum Speed Dome CameraNegotiableMOQ: 50 Pieces
-
RM600G Professional Handheld Thermal CameraNegotiableMOQ: 10 Pieces
-
EX10 Thermal Imaging Camera 160×120 IR Resolution Enhanced to 320×240US$ 169 - 179MOQ: 1 Piece
-
TE464G Explosion-Proof Gas Imaging PTZNegotiableMOQ: 50 Pieces
-
TE365 Dual-Spectrum Explosion-Proof Bullet CameraNegotiableMOQ: 10 Pieces
-
PC464A1 Dual-Spectrum PTZ CameraNegotiableMOQ: 50 Pieces
-
FC460A Observation Thermal Bullet CameraNegotiableMOQ: 50 Pieces
-
FC125T Dual-Spectrum Turret CameraNegotiableMOQ: 50 Pieces
-
SilentW-U12 Series Infrared Panoramic CameraNegotiableMOQ: 50 Pieces
-
Raythink RG630F Portable OGI Camera IP54 Rated -30℃~60℃ Operating Temperature 5-Hour Battery LifeUS$ 99999MOQ: 1 Set
-
Multi-Functional TN460U Ultra-High Temperature Thermal Camera for Factory UseNegotiableMOQ: 50 Sets
-
Expert-Grade RT630 Thermal Camera: 640×512, 35mK NETD & Powerful Analysis FunctionsNegotiableMOQ: 50 Sets